Travis CI is known as everyone's favorite Continuous Integration system, offering free testing for open source projects. It also integrates super-well with GitHub, optionally testing not just all your branches, but also pull request - automatically. All around, it's an amazing tool to test and build applications written in a variety of languages, including Ruby, Node, Objective-C, Go, Java, and virtually everything else that runs on Linux - thanks to Mono, even C# and F# are supported!
It also features its own deployment engine, allowing developers to have Travis deploy successfully tested apps. We extended the Travis deployment engine with a provider for Azure Web Apps, enabling you to use your free GitHub account and your free Travis CI testing to deploy apps to your free Azure Web App. In this post, I'll explain how to use Travis to test your projects - and how you can deploy successfully tested apps directly to Azure.

Requirements: GitHub, Travis, Azure
In order to use the full integration flow, you'll need an account with all three providers. Feel free to skip this part if you already have GitHub, Travis, and Azure setup.
All three providers offer paid solutions, but for the basic flow, you won't have to pay a single penny: GitHub is free for any public source code; Travis will test your public GitHub repositories for free; and Azure will gladly host simple web apps for free.
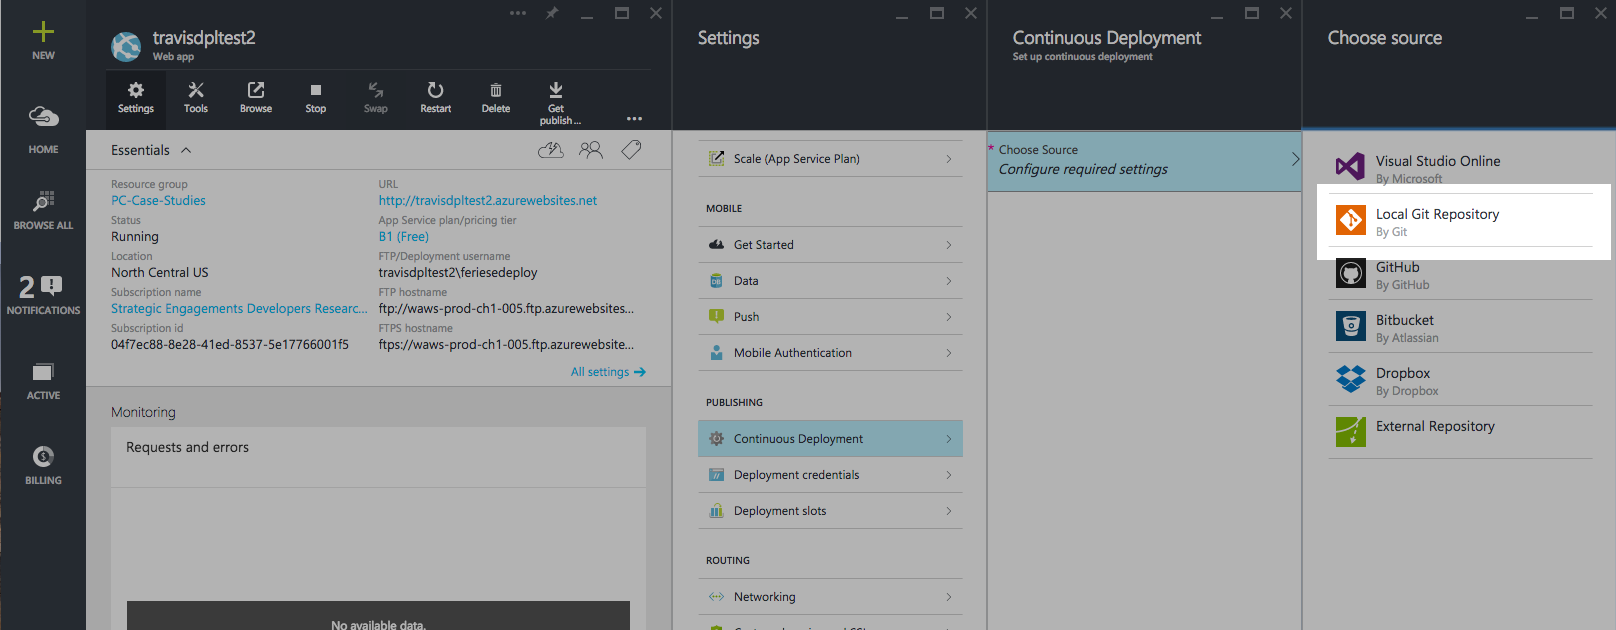
First, create an Azure Web App. When creating the Azure Web App, enable "deployment from source control", choosing "Local Git Repository" as your deployment method. Azure will then go and create a Git repository for your website, meaning that we can "git push" to Azure.
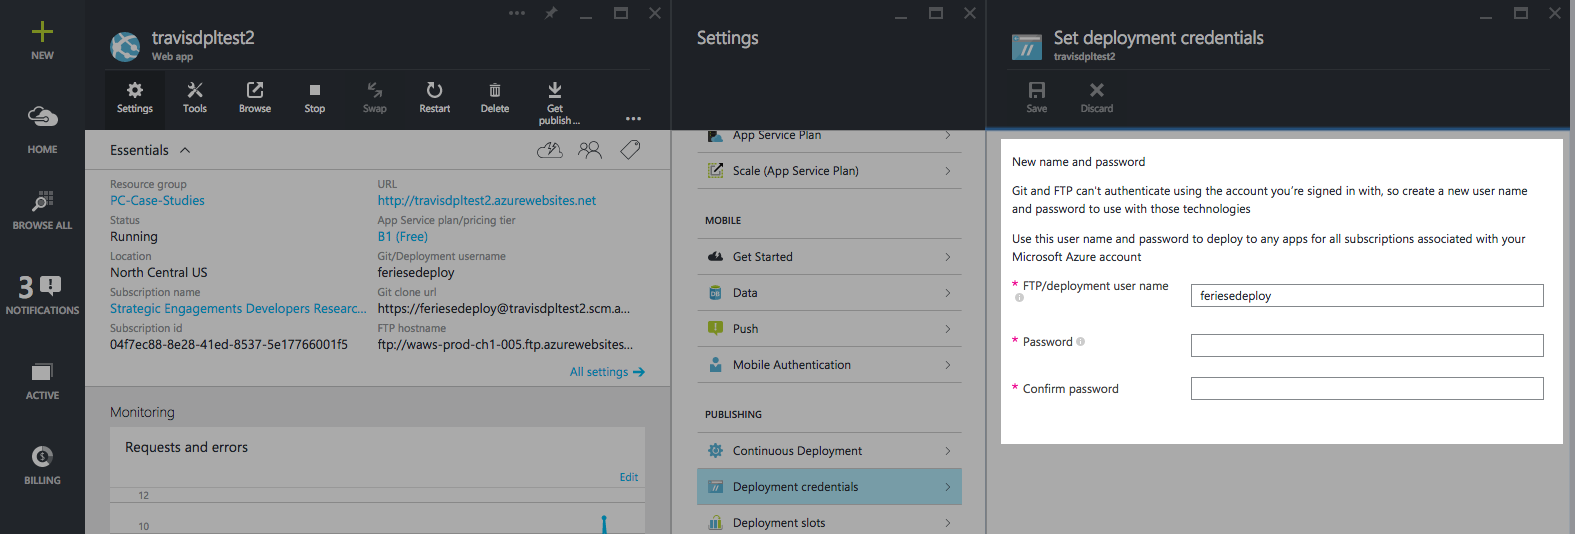
If you never used Azure's continuous integration features, it is possible that you also don't have "deployment credentials" setup. Those are the credentials used to authenticate with FTP or Git on Azure - for security reasons, you have to create a separate set of credentials and cannot use the username/password combination used to login into the Azure Management Portal. To set your deployment credentials, select "Deployment Credentials" in your Web App's settings.
Then, create a GitHub repository and connect it to Travis. If this is your first time using Travis, check out their "Getting Started Guide" - it is quite good and should contain all the information you need.
Add Deployment Instructions
Like all Travis settings, you configure your Azure deployment in .travis.yml.
deploy:
  provider: azure_web_apps
  username: "Your Azure Deployment Username"
  password: "Your Azure Deployment Password"
  site: "Name of your Azure Web App"
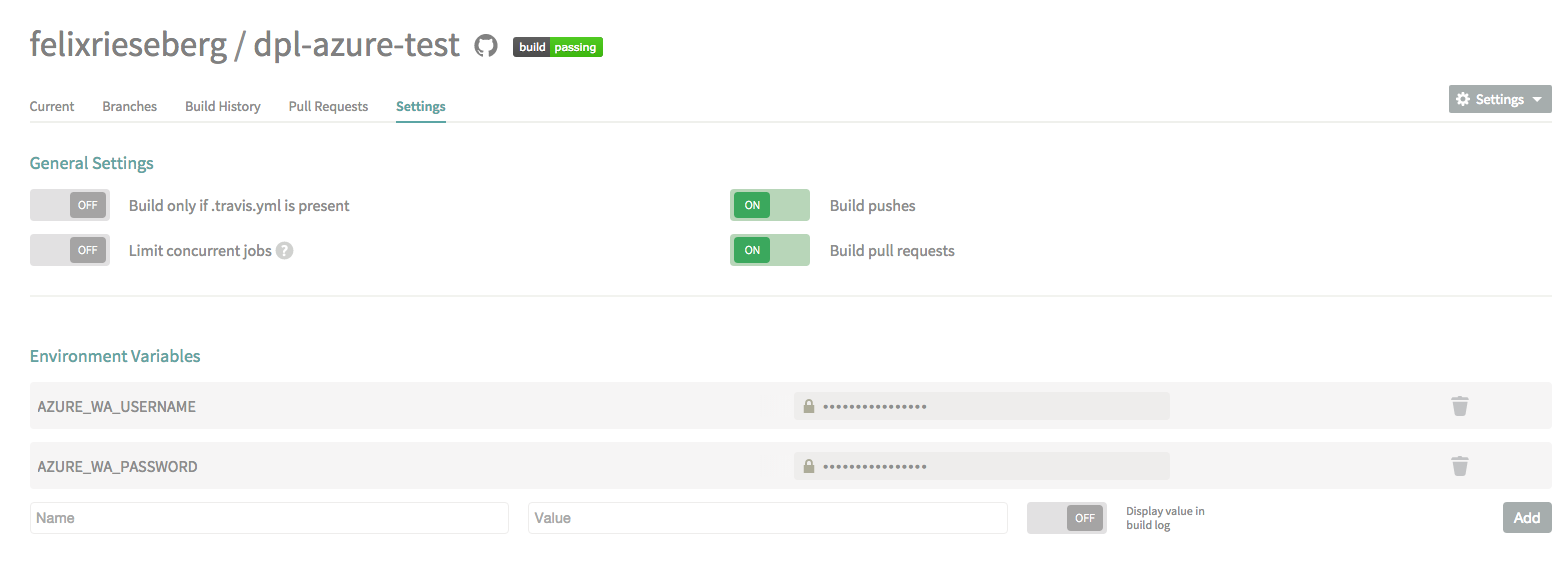
It'd be unwise though to keep your deployment credentials in .travis.yml - for that reason, the Azure provider also accepts environment variables. You can set secret environment variables in the Travis Settings for your repository. Use AZURE_WA_USERNAME for the deployment username, AZURE_WA_PASSWORD for the deployment password, and AZURE_WA_SITE for the site name.
Then, simply include these innocent two lines in your .travis.yml:
deploy:
  provider: azure_web_apps
Pre-Deploy Steps
You might want to customize your deployment - maybe you don't want to deploy the "fresh" GitHub repository, but instead have Travis push the content folder with all files generated during testing. This would allow you to use Travis for more than just testing - since the machine is already running, you can execute commands and scripts on your repository before it is being deployed to Azure. To enable this feature, use the skip_cleanup setting:
deploy:
 provider: azure_web_apps
 skip_cleanup: true
Conditional Deployments
In most cases, deployments shouldn't happen for every single test run - you most likely want to limit the deployment to a specific branch, tag, or even language runtime. Travis offers settings that make this easily possible. All of the options below can be combined.
To deploy only when a certain environment variable is present, use:
deploy:
 provider: azure_web_apps
 on:
   condition: $MY_ENV = super_awesome
To deploy a certain branch only, use:
deploy:
 provider: azure_web_apps
 on:
   branch: release
Travis users often use multiple runtime versions in their tests. Let's take Node apps as an example: You'll probably test your app against Node 0.10, 0.12, and iojs, but you only want to deploy your application once. You can limit the deployment to only act when certain runtime versions are present. This works for jdk, node, perl, php, python, ruby, scala, and go.
deploy:
 provider: azure_web_apps
 on:
   node: '0.11' # this should be quoted; otherwise, 0.10 would not work
Now, whenever you push a new commit to GitHub, Travis will test it - and if the test passes, it will deploy it over to Azure. Enjoy your continuous integration!