The Azure Mobile Services are a toolkit of common cloud tasks for mobile apps with cross-platform SDKs and libraries. In practice, they enable developers to quickly enable usually complex tasks like authentication, data synchronization, push notifications and on-premises connections for a host of platforms, including Android, iOS, and Windows Phone - but also Xamarin, JavaScript/HTML, Sencha, Appcelarator, and Cordova (formerly known as PhoneGap).

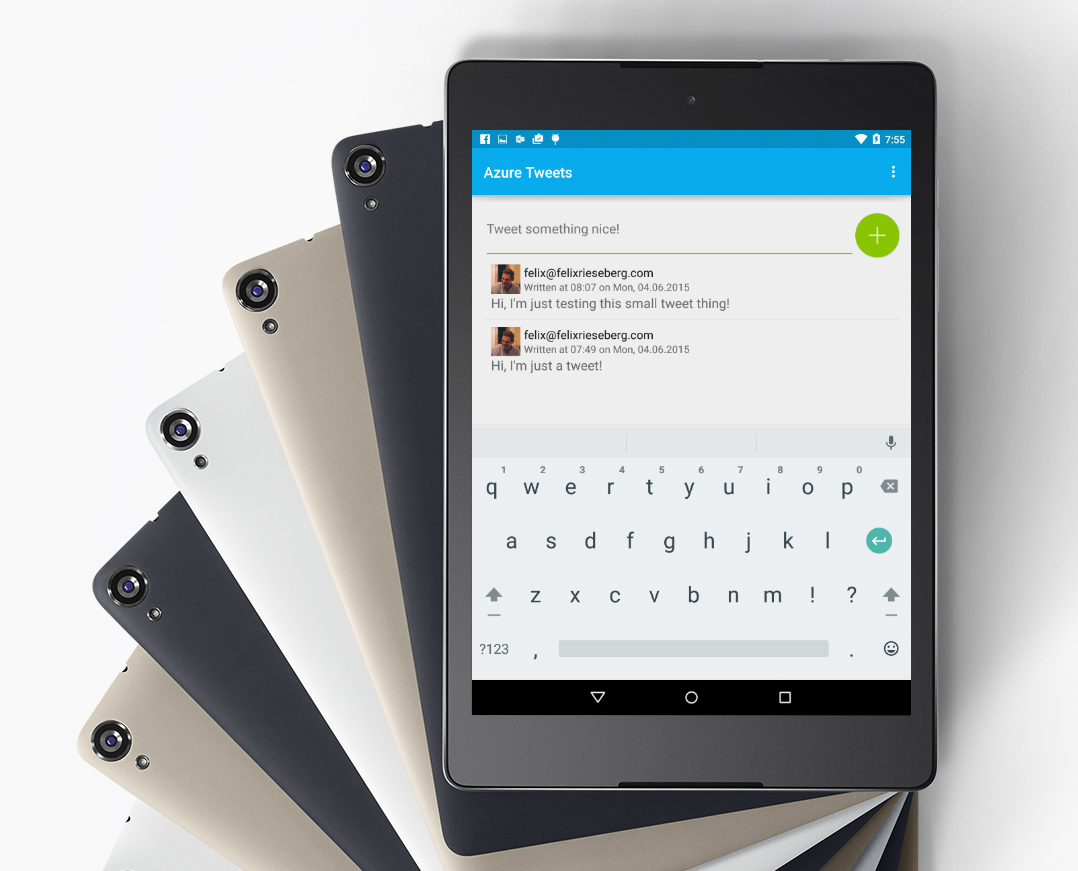
This tutorial describes one of those tools for Android: We'll build a simple Twitter Clone, using Azure to synchronize tweets. Azure Mobile Services is fairly straightforward: It's a cloud service storing data in Azure SQL, SQL or Mongo. Setting up the service, you can choose between a JavaScript- and a .NET-based backend. The choice is interesting since you can extend and modify how the service handles data - if you prefer JS as a developer, a JS-based back-end will allow you to change the JS method responsible for inserting data, for instance. To connect your clients with the service, you simply choose the right SDK for your platform and glue your data and your brand-new cloud back-end together.
I'm assuming here that you already set up a back-end service in Azure - if you haven't, please log into the Azure Management Portal and set one up. Simply click on the 'New' button in the lower left, select 'Compute / Mobile Service'. Azure will open up a dialog asking for the name and type of back-end. As far as the database is concerned, feel free to test this thing out with the free 20mb SQL database - if you're more serious, the dialog will guide you through the creation of a new SQL Server.

Let's Gather our Tools
We'll be using Android Studio and the Android SDK 21 with build tools 21.1.2. Create a new project and choose 'Phone & Tablet' with the API level 21. When asked what kind of activity you want to add to the project, choose the 'Blank Activity'. That activity will be our timeline with tweets, so feel free to just call it timeline_activity.
To connect our app to the Mobile Service, we'll use the Azure Mobile Services Android SDK 2.0.2 (Beta 2), which is directly available from jCenter, meaning that Android Studio will automatically download it for us. In Android Studio, open up app/build.grade and add the following in the dependencies section:
compile 'com.microsoft.azure:azure-mobile-services-android-sdk:2.0.2-beta2'
Service, Table, Class
Here's what our integration looks like from 10,000 feet: Upon start of the app, we'll connect to our Mobile Service. If that succeeds, we'll create 'smart table' holding our tweets, Which is synchronized with a table in the cloud. Obviously, that table will need to know which class the items it's holding belong to.
The Tweet Class
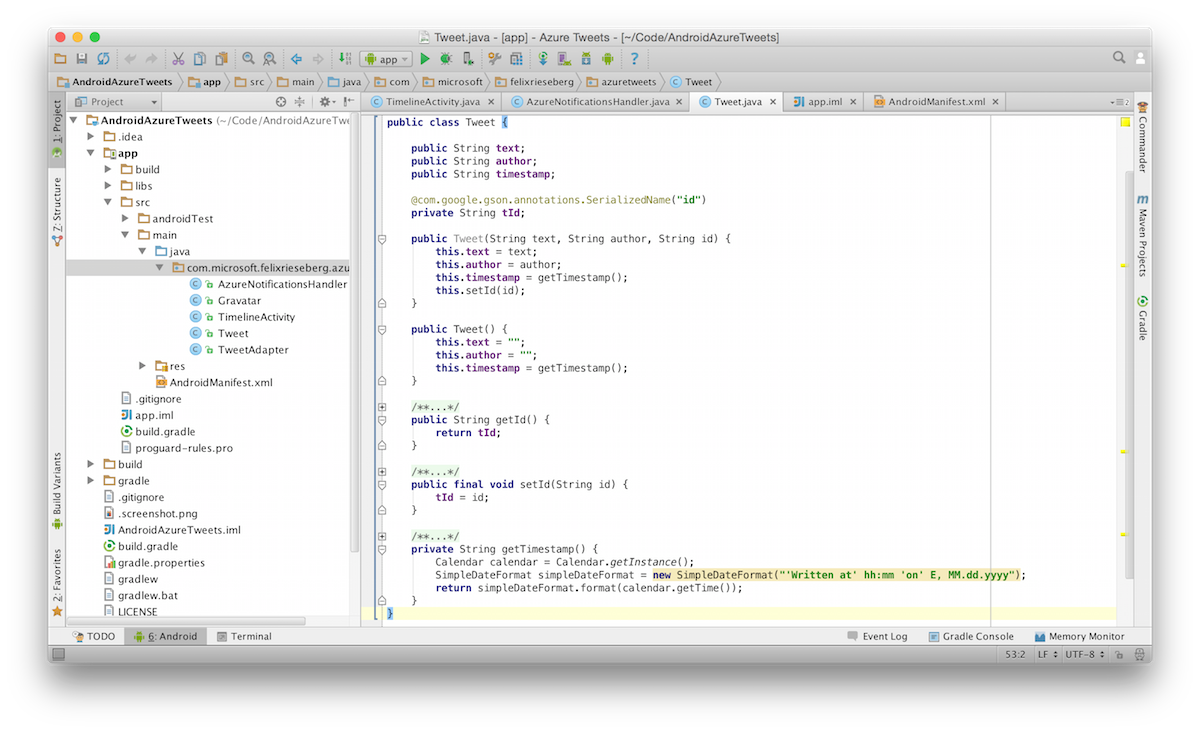
Let's start with the class for the tweets. I'm keeping things simple here: Each tweet has an id, an author, a message, and a timestamp. Text, author and timestamp will just be simple Strings, while I'll follow good coding practice and enable the id to be get and set with methods called getId() and setId().

You can find the full source code for the tweet class here.
Connecting to the Service
Next, let's connect to the Mobile Service and create our 'smart table'. Open up your timeline activity and add the following two properties.
public static MobileServiceClient mobileServiceClient;
private MobileServiceTable<Tweet> mobileServiceTable;
We can now use the OnCreate method to connect to the service. Initialize your MobileServiceClient with the URL and the key of your service (and the current context). Once that succeeds, we can initialize our 'smart table' by calling the client.
@Override
    protected void onCreate(Bundle savedInstanceState) {
        super.onCreate(savedInstanceState);
        setContentView(R.layout.activity_timeline);

        // Setup the client
        try {
            mobileServiceClient = new MobileServiceClient(
                    "YOUR-SERVICE-URL",
                    "YOUR-SERVICE-KEY",
                    this
            );
            mobileServiceTable = mobileServiceClient.getTable(Tweet.class);
        } catch (java.net.MalformedURLException e) {
            throw new RuntimeException(e);
        }
    }
Adding the User Interface
Let's summarize the things we'll need: For a new tweet, we'll need the message, the author name, and a button used to submit the message. To display existing tweets, we need a ListView.
If you want to check out my UI solution, head over to GitHub to see the source code. I used a simple EditText for the message input, an ImageButton for the submit button, and a ListView for the list of tweets. You'll notice that I didn't ask for the users name - I'm doing that in a popup dialog, so that the user has to set it only once.
The Tweets ListView
For the individual tweet inside the list, I used three TextViews (Author, Timestamp, Message) as well as an ImageView to display the author's gravatar.
A ListView needs an adapter, so let's create one. You can find mine on GitHub, but let's look at the individual parts: I'm extending the default ArrayAdapter, using only the GetView method used to decorate the individual tweet.
In that method, we get all the views for the individual tweet and decorate them with the actual data.
@Override
public View getView(int position, View convertView, ViewGroup parent) {
    Tweet tweet = getItem(position);

    if (convertView == null) {
        convertView = LayoutInflater.from(getContext()).inflate(R.layout.tweet, parent, false);
    }

    // Lookup View for Data Population
    TextView tweetText = (TextView) convertView.findViewById(R.id.tweetText);
    TextView authorText = (TextView) convertView.findViewById(R.id.authorText);
    TextView timestampText = (TextView) convertView.findViewById(R.id.timeText);
    ImageView avatarImage = (ImageView) convertView.findViewById(R.id.avatar);

    // Set Tweet, Author and Timestamp
    tweetText.setText(tweet.text);
    authorText.setText(tweet.author);
    timestampText.setText(tweet.timestamp);

    return convertView;
}
The only interesting thing happening here is the avatar: If the users has entered an email address as his or her username, we'll go and ask Gravatar for a saved avatar. Feel free to copy the Gravatar class that makes this possible. To load a found Gravatar into the ImageView, I'm using Square's fantastic image library Picasso.
// Set Avatar
String avatarUrl;

if (IsEmail(tweet.author)) {
    avatarUrl = Gravatar.getAvatarURL(tweet.author);
} else {
    avatarUrl = "http://www.gravatar.com/avatar/205e460b479e2e5b48aec07710c08d50?f=y&d=retro";
}
try {
    Picasso.with(avatarImage.getContext()).load(avatarUrl).into(avatarImage);
} catch (Exception e) {

}
Displaying Tweets
Let's head back to the timeline activity to display existing tweets. First, add properties for our newly created adapter, ListView, and an array the ListView needs to hold its content.
private ArrayList<Tweet> tweetList = new ArrayList<Tweet>();
private TweetAdapter tweetAdapter;
private ListView tweetsListView;
Next, head over to the OnCreate method and glue those pieces together. You can also call GetTweets(), a method we'll create in the next step.
// Bind the list of tweets to the adapter
tweetsListView = (ListView) findViewById(R.id.tweetListView);
tweetAdapter = new TweetAdapter(this, tweetList);
tweetsListView.setAdapter(tweetAdapter);

// Get some tweets, yo
GetTweets();
To actually get tweets, we'll be part of the cool crowd and use AsyncTask and Futures, brand new Android tools to deal with asynchronism. The core piece here is mobileServiceTable.execute().get() - we're calling the 'smart table', asking it to execute() a query and get() the results. Since I'm lazy and this demo is supposed to be simple, we're not doing any kind of smart logic here, which is why we're not providing an actual query, instead asking for all data.
public void GetTweets() {
    if (mobileServiceClient == null) {
        return;
    }

    new AsyncTask<Void, Void, Void>(){
        @Override
        protected Void doInBackground(Void... params) {
            try {
                final List<Tweet> results = mobileServiceTable.execute().get();
                runOnUiThread(new Runnable() {
                    @Override
                    public void run() {
                        tweetAdapter.clear();

                        for(Tweet tweet : results){
                            tweetAdapter.add(tweet);
                        }
                    }
                });
            } catch (Exception e){
                createAndShowDialog(e, "Error");
            }

            return null;
        }
    }.execute();
}
Adding Tweets
Adding tweets looks a lot like getting tweets. We already created our user interface elements, but the activity isn't aware of them yet. Add properties for the tweet input element as well as a string able to hold the author value:
private EditText tweetInput;
private String author;
Next, in OnCreate(), set tweetInput to the actual input element in the layout:
tweetInput = (EditText) findViewById(R.id.tweetInput);
To make things easy, I gave the ImageButton an onClick property, setting it to a method called AddTweet(). Since the layout will call AddTweet() with the current view as a parameter, we need to create two methods in our timeline activity:
public void AddTweet() {

}

public void AddTweet(View view) {
    AddTweet();
}
Let's look at the logic in AddTweet(): We need to get the tweet input, ensure that the user has set a username value (and ask for one, if he or she hasn't), and send of the tweet. Let's look at ensuring the username first:
public boolean EnsureAuthor() {
    if (author == null || author == "") {
        SetUsername();
        return false;
    } else {
        return true;
    }
}

private void SetUsername() {
    AlertDialog.Builder alert = new AlertDialog.Builder(this);

    alert.setTitle("Login");
    alert.setMessage("Please enter your e-mail address or name:");

    final EditText input = new EditText(this);
    alert.setView(input);

    alert.setPositiveButton("Ok", new DialogInterface.OnClickListener() {
        public void onClick(DialogInterface dialog, int whichButton) {
            author = input.getText().toString();
        }
    });

    alert.show();
}
Now that we can guarantee that a username value has been set, we can head over to actually creating the tweet. Again, we're using AsyncTask and Final.
public void AddTweet() {
    // If the service is null or the author isn't set yet,
    // return right away and let the user try again.
    if (mobileServiceClient == null || EnsureAuthor() == false) {
        return;
    }

    // Create the Tweet object
    final Tweet item = new Tweet();
    item.text = tweetInput.getText().toString();
    item.author = author;

    // Send the tweet away to the service
    new AsyncTask<Void, Void, Void>(){
        @Override
        protected Void doInBackground(Void... params) {
            try {
                final Tweet entity = (Tweet) mobileServiceTable.insert(item).get();
                runOnUiThread(new Runnable() {
                    @Override
                    public void run() {
                        tweetAdapter.add(entity);
                    }
                });
            } catch (Exception e){
                createAndShowDialog(e, "Error");
            }

            return null;
        }
    }.execute();

    // Set the input field back to empty.
    tweetInput.setText("");
}
There we go, the tweet is created!
Summary
You can find the full source code for this simple Twitter Clone on GitHub - both with the synchronization feature only, as well as in a version that also implements push notifications.